On April 8, 2024, a total solar eclipse crossed a huge swath of the United States. We had been planning a trip to see it ever since the August 21, 2017 total solar eclipse. Our chosen destination was at Chalk Bluff River Resort and Park, near Uvalde, Texas, due to statistical likelihood of clear skies in South Texas:
The main attraction at Chalk Bluff is Nueces River and the the eponymous bluffs that rise above it:
Chalk Bluffs
The eclipse was widely publicized. Enough so that the state of Texas found it necessary to put warnings on its highway signs:
Texas DOT warning sign
Texas DOT warning sign
We arrived at Chalk Bluff on April 6. As eclipse day approached, it became clear that the weather was not going to be our friend:
NWS blended forecast for eclipse day
So, what was originally going to be an "Eclipse expedition, with a possibility of some birding" became a "Birding expedition, with a possibility of seeing an eclipse". It is fortunate that we chose this approach, because the last clear shot we got of the Moon was on April 4:
April 4 waning moon
The day before the eclipse, April 7, had somewhat clear skies, so I set up and aligned my equatorial mount to eliminate one more thing to do on eclipse day:
Testing the mount the day before
With the mount set up, and with the camera and lens balanced, I marked the balance point (so I would not have to do *that* on eclipse day either):
Blue mark for dovetail balance point
The staff at the resort threw a party for the eclipse-goers, and even had some staff members dressed as the Earth, Moon, and Sun make an appearance - even getting into the proper sequence!
Eclipse day arrived, and it was cloudy as predicted. Every once in a while a hole would appear in the clouds, giving us some hope. So, we set up our equipment and started the computers:
Equipment, during totality (also showing clouds)
My equipment was as follows:
Canon EOS R5 with a 500mm f/4 telephoto, controlled by CaptureEclipse on a Macbook M1. This lens had a full-aperture solar filter on it except for during totality.
Canon EOS R7 with a 14mm f/2.8 wide angle (these photos ended up out-of-focus and unusable)
Canon EOS 5D Mark IV with an 8mm f/4 fisheye lens, running its internal intervalometer with a 10 second interval
GoPro MAX 360 spherical camera, running its internal intervalometer with a 2 second interval
Pre-totality, the clouds were nearly completely opaque. The partial eclipse peeked through just a few times, and only for a few seconds. But, miracle of miracles, right at totality, the clouds thinned enough to see it all naked eye and photographically! Here is a sequence of "totality sunset":
Totality Sunset
Since the Sun was close to its maximum activity levels, there were many highly visible prominences. These are loops of plasma that follow the loops in the Sun's magnetic fields, well above the surface of the Sun. The loops are much bigger than the Earth. They were very evident even to the naked eye!
Solar Prominences
The longish duration of totality meant that we could catch it at a few different points (although all of totality was at least partially obscured). I made a collage out of the best images. The top left shows the corona and the beginning and ending "diamond rings". The bottom right image is an all-sky 180-degree view.
I made a few time-lapse animations of the entire eclipse. This is the polished "final video" showing various highlights, and slowing down during totality:
I also made a less-polished animation from a 360-degree GoPro camera. You can pan and zoom in this view to get a close-to-first-person experience (although nothing beats seeing it in person):
I also un-warped and cropped the all-sky video to show the eclipse over the bluffs:
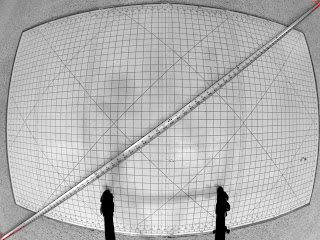
Here is one single frame from the all-sky camera during totality, showing the corona as well as the cloud cover:
All-sky totality
Cropped totality
After totality was over, we posed for an eclipse selfie:
After eclipse day, we continued our expedition to see Texas wildlife. You can see the highlights in this photo album. And I got a view of the Moon just a couple of days post-eclipse:
Waxing moon post-eclipse
When we got home, we had driven 3,163 miles over 16 days, had taken nearly 10,000 photos of eclipse and animals, and had experienced an epic journey!
Trip odometer
Despite the clouds, the eclipse was worth it all. Any total solar eclipse you can see is an experience of a lifetime. Go if you can - you will not regret it!
PS: A Google Photos album of the eclipse-related photos can be found here. They are licensed under CC BY 4.0:
You are free to:
Share — copy and redistribute the material in any medium or format for any purpose, even commercially.
Adapt — remix, transform, and build upon the material for any purpose, even commercially.
The licensor cannot revoke these freedoms as long as you follow the license terms.
Under the following terms:
Attribution — You must give appropriate credit , provide a link to the license, and indicate if changes were made . You may do so in any reasonable manner, but not in any way that suggests the licensor endorses you or your use.
No additional restrictions — You may not apply legal terms or technological measures that legally restrict others from doing anything the license permits.
On 1 April 2026, the Artemis II mission launched for a crewed trip around the Moon. I had heard that, in the Apollo missions, the spaceships were viewed and/or imaged from several ground-based telescopes, and I wanted to try it myself. The first task was to figure out where, exactly, the capsule would be. After figuring out that the "Integrity" would rise from my location around midnight, and after verifying that I might have some clear weather, I used the JPL Horizons database to generate an ephemeris of the right ascension/declination coordinates as seen from my location: I saved it as a CSV and imported it into a spreadsheet, where I used a table of predicted brightness values based on distance to figure out if it would *really* be visible: I also imported these coordinates into Stellarium so I could visualize their actual location in the sky at the various times. I did this by creating a Javascript script that I then pasted into the Stellarium script editor: The m...
I got two GoPro Hero3 Black cameras and am planning a panoramic project with them. However, to do the project correctly and accurately, I need a good read on their field-of-view. So, I set up a tripod and a grid and a tape measure, and took a few photos. Here they are, desaturated and contrast-enhanced, with central red dots and some annotations. First, measuring the diagonal FOV: Next, the horizontal FOV: Finally, the vertical FOV: The front of the camera lens was almost exactly 17 inches from the grid. The camera body started about 17.25 inches from the grid. Assuming the sensor is embedded some distance into the body, I used an estimated field-to-sensor distance of 17.5 inches. This yields the following field-of-view, in degrees: Diagonal: 146 Horizontal: 121 Vertical: 93 Doing a little interval math on the field-to-sensor distance shows these angles are accurate to about plus or minus 1.5 degrees. Int...
A few years ago, I converted various planet maps to icosahedral models . You can print these out, cut along the solid lines, fold along the dotted lines, and have a nice icosahedron to play with. Since then, two more robot spacecraft have created global maps of planetary bodies. Most recently, the New Horizons spacecraft flew past Pluto. Here is an icosahedral projection of the data we have so far: Also fairly recently, the Dawn spacecraft has orbited both Vesta and Ceres, two of the largest asteroids (or "dwarf planets" as the new nomenclature has it) in the Solar System. Here are icosahedral projections of those two. First, Vesta: Next, Ceres - note the mysterious white spots toward the upper right: All of the data used to create these projections was taken from Steve Albers' Planetary Maps Page , which I highly recommend. Edit: A PDF file of helpful hints on assembling these can be found here .



Comments